In my last post “AI primer: Image Models 101”, I recommended Midjourney and Stable Diffusion as my top two choices. If your goal is to make beautiful images and art, Midjourney is the best choice, as they have a very easy to use service and can produce high quality output with minimal effort.
However, if you are a hobbyist and tinkerer, or just want to invest a bit of time to go deeper in this space, Stable Diffusion is a great choice. It’s a bit more involved to set up, but has several advantages:
- It is one of the few image generation models that you can run fully offline on your own computer - it’s free and no cloud service required!
- You can generate images that you have a hard time generating with models like Midjourney, such as images with an obscure or very specific style.
- The model weights are open to inspect, and you can fine-tune these weights to achieve various effects (which we will talk about in a future post).
- It has a powerful suite of image to image models — such as for upscaling, inpainting, and outpainting.
- There’s a large community of open source developers and hobbyists who work on a wide range of tools and applications around it.
Sold? Let’s get started!
Easy 1-click options
The open source community has made it easy to set up a basic Stable Diffusion setup in just a few clicks. You can use these options if you want something quick and easy to work with.
- NMKD UI is the easiest 1-click option for Windows users.
- Diffusion Bee is a popular option for Mac users.
- Easy Diffusion has installers for Windows and Linux that are fairly easy to use.
The option I would most recommend however, is the Automatic1111 Web UI. This UI has the most functionality and is actively used by the community for the most cutting-edge work in this space. Installing and using it is a little more daunting compared to the other three options above, but if ease of use were your goal, you might be better off with something like Midjourney anyway.
So, if working with the command line and getting a bit in the weeds doesn’t faze you, read on!
Pre-requisites
Large AI models typically require immense compute capability, particularly in the form of GPUs. Even though Stable Diffusion is light enough to run on your own computer, you’ll still get the best results from having a fairly beefy setup:
- PC with 8 GB or more RAM, and at least 10 GB of free disk space.
- A good GPU with at least 6 GB of VRAM. NVIDIA is preferred though AMD can work too.
- If you are on a Mac, then any of the Apple Silicon (M1 or higher) laptops will work, thanks to CoreML optimizations made by the Apple ML research team!
If you are on a Windows PC, I recommend installing WSL2 first. WSL2 is basically an easy way to run a full Linux installation within Windows. While Stable Diffusion is fully supported on Windows natively, I’ve only set it up in WSL2 and there are a lot of nice Unix tools that make my workflows easier.
Installing WSL is fairly straightforward, open a Windows terminal or PowerShell and type:
> wsl --install
This installs the latest version of Ubuntu, which is what I use. Most of the instructions that follow are common to Windows, Linux, and Mac.
Python is the lingua franca of all things AI, so we’ll need an installation. Python is notorious for a very messy package management system that is rife with version conflicts, specifically so for commonly used ML packages that aren’t always compatible with every python version. I don’t recommend using the standard system version for this reason.
A lot of projects suggest using python virtual environments (venv), but I go a different route. venvs are annoying because you have to manually activate them, and sometimes I do want two projects to use the same set of python packages. So I went with pyenv which is a lightweight way to manage multiple python versions. Installing pyenv is easy:
$ curl https://pyenv.run | bash
Make sure to add the required lines to your~/.bashrc or ~/.zshrc file as instructed. For bash this looks something like:
$ echo 'export PYENV_ROOT="$HOME/.pyenv"' >> ~/.bashrc
$ echo 'command -v pyenv >/dev/null || export PATH="$PYENV_ROOT/bin:$PATH"' >> ~/.bashrc
$ echo 'eval "$(pyenv init -)"' >> ~/.bashrc
You can test this worked by opening a new terminal and typing:
$ pyenv versions
Don’t worry about installing a python version for now, we’ll do it while installing the Stable Diffusion UI. Now is a good time to install git if you haven’t already:
$ sudo apt install git
On the Mac, git should already be installed if you have ever installed Xcode. If you didn’t, I recommend you install Homebrew first, and then install git:
$ brew install git
You should now have all the prerequisites!
Installing stable-diffusion-webui
Automatic1111’s UI has everything you need to get going. I recommend installing it by cloning the Github repository as it makes keeping up to date with changes easy:
$ git clone https://github.com/AUTOMATIC1111/stable-diffusion-webui.git
Because we are using pyenv, the installation instructions will differ somewhat compared to the official ones. But feel free to use the official installer scripts if you prefer using the venv setup, they work just as well.
# Make sure you are in the webui folder
$ cd stable-diffusion-webui
# Python version 3.10.6 works best
$ pyenv install 3.10.6
# We set this specific version to activate whenever we are in this directory
$ pyenv local 3.10.6
Now we can install the UI:
# IGNORE if you are on WSL or Linux, only do this on Mac:
$ source webui-macos-env.sh

# launch.py also intalls any dependencies the first time you use it
$ python launch.py
This will take some time the first time you run it, as it will also install all your python dependencies into pyenv, as well as fetch the Stable Diffusion 1.5 model weights. Once it’s done, you should see something like this:
Running on local URL:  http://127.0.0.1:7860

To create a public link, set `share=True` in `launch()`.
Startup time: 8.2s (import torch: 1.0s, import gradio: 0.9s, import ldm: 0.3s, other imports: 1.0s, load scripts: 0.3s, load SD checkpoint: 4.6s, create ui: 0.1s).
Launch that URL in a browser and you should see something like this:
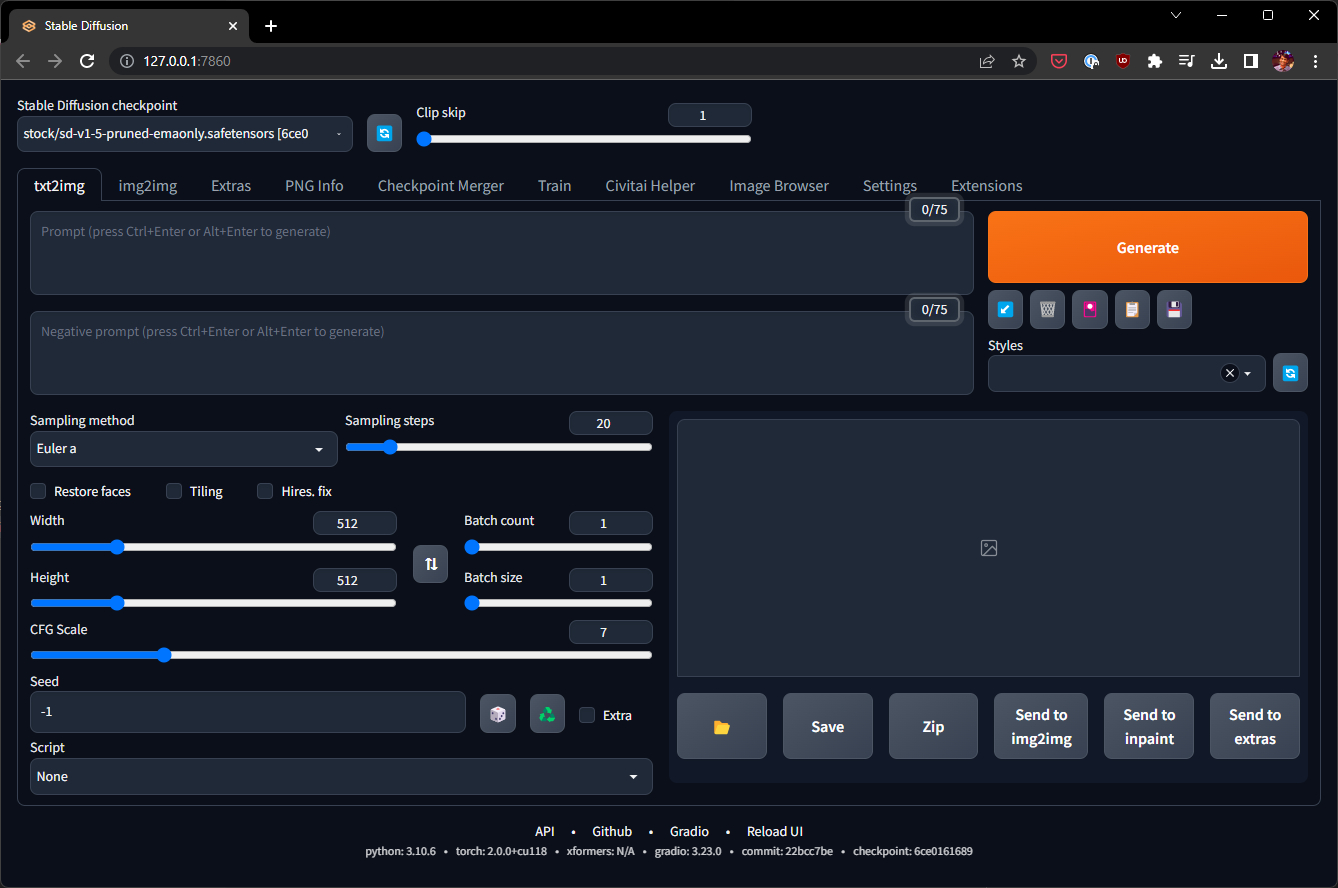 Default stable-diffusion-webui
Generating your first image
The UI can be a bit overwhelming at first, but you only need a few key inputs to get started. On the top left, the UI should have automatically selected the “v1-5-pruned-emaonly.safetensors” checkpoint. This is the default stable diffusion v1.5 image generation model. The real power of Stable Diffusion comes from community-generated variants of this base model, which you can download and select here. However, for now, let’s stick with the default.
The two big text boxes are where you will type your prompt and negative prompt. Stable diffusion is unique in its ability to receive negative prompts to suppress undesirable elements in an image. AI models specifically struggle with drawing accurate human hands, faces, and limbs, which can sometimes lead to deformed images — negative prompts are a great way to help with this.
For now, type this into your prompt text box:
masterpiece, best quality, cartoon illustration of a corgi, happy, running through a beautiful green field, flowers, sunrise in the background
and in the negative prompt:
low quality, worst quality, bad anatomy, bad composition, poor, low effort
Make sure “Sampling method” is left at Euler a. Set “Sampling steps” to 40.
Set “Seed” to 1481517414. Click the big “Generate” button!
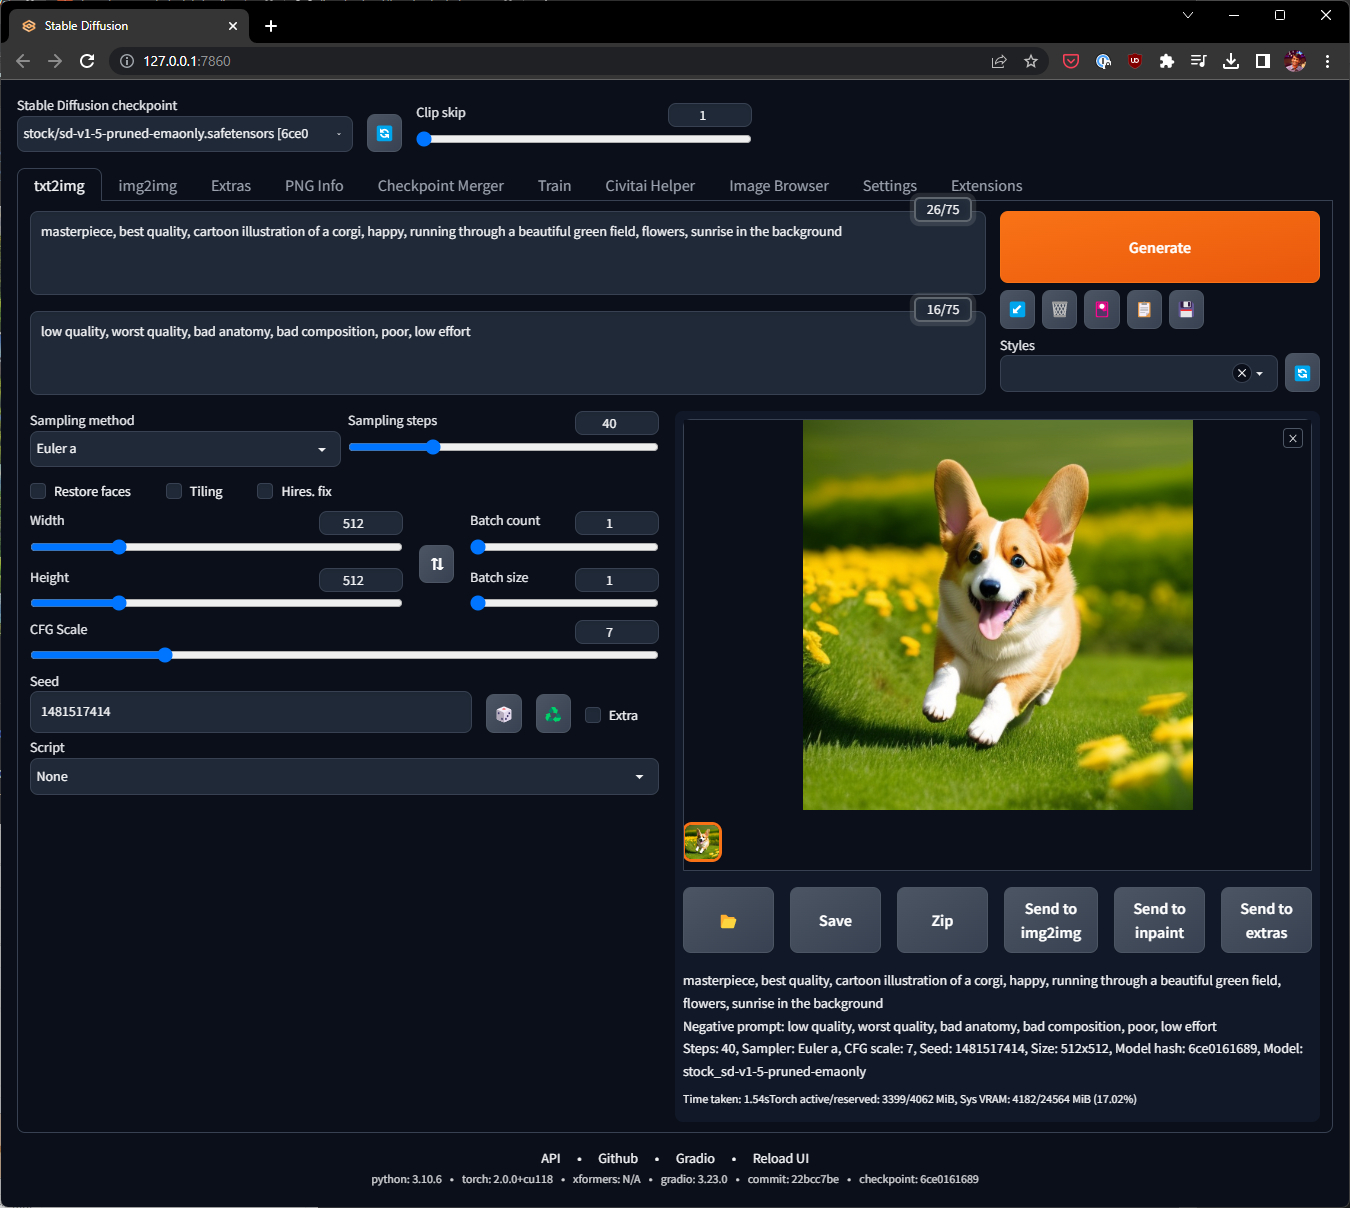
If all went well you should see an image that’s almost exactly or as close to the one in picture above! That’s because we used the same base model, sampler, sampling steps and most importantly the seed number.
Congratulations on generating your first image with Stable Diffusion!
Tips for NVIDIA GPUs
If you have any NVIDIA GPU, you will get better performance by starting the UI with the xformers argument:
$ python launch.py --xformers
For this to work you have to install the proper NVIDIA video drivers. If you are on WSL, make sure to install the drivers on Windows and not Linux. There is an annoying bug in WSL currently that also requires you to create a few symbolic links for libcuda.so - the workaround is described here, essentially you run this in a Windows terminal or PowerShell:
> C:
> cd \Windows\System32\lxss\lib
> del libcuda.so
> del libcuda.so.1
> mklink libcuda.so libcuda.so.1.1
> mklink libcuda.so.1 libcuda.so.1.1
You’ll have to do this every time you update your NVIDIA drivers until Microsoft fixes the bug in WSL.
Confusingly, if you have an NVIDIA RTX 40 series card, my observation is that you will get the best performance by not using xformers - but instead updating to the latest version of torch with CUDA 11.8 support:
$ pip install torch==2.0.0 torchvision --extra-index-url https://download.pytorch.org/whl/cu118
Then launch stable-diffusion-webui with the following arguments:
$ python launch.py --opt-sdp-no-mem-attention --opt-channelslast
You can substitute --opt-sdp-no-mem-attention with just --opt-sdp-attention for even faster performance at the cost of some non-determinism (you may not be able to recreate the exact image even with the same seed).
To squeeze even more performance out of Stable Diffusion, if you are on WSL, consider disabling “Hardware-accelerated GPU scheduling” from your Windows Settings. This may impact performance of games running natively on Windows though, YMMV.
Things to try
Now that you have a basic set up, you can start to explore all the knobs presented to you in the UI. Here are some things to try:
- The dice icon next to “Seed” sets the value to -1 which will use a random number every time you click generate. Try this a few times to see how you can generate an almost infinite variety of images from the same prompt.
- The “CFG” Scale slide above it sets how directive you want your prompt to be. Low values will give the model freedom to be much more creative in its interpretation of your prompt, while high values will make it more likely to generate images that stick very closely with your prompt.
- At first glance, it might seem like a good idea to set this to higher values, but I’ve realized I’m not very good at writing detailed descriptions of images. Lower values can be quite helpful to fill in details you didn’t think of, but are natural in the output 😉
- Setting “Batch size” to 4 will generate a set of four images for every prompt, so you can generate more variations in parallel (pair with Seed of -1).
- The “Sampling methods” are fun to play with. Almost all of them will converge on the same image given enough steps. Euler converges to a good image in a reasonably few number of steps (30-ish), others can generate higher quality images but need more steps to fully realize.
- The exception to convergence are the methods suffixed with
a, such asEuler aorDPM 2 a. These samplers will converge on a different image that are a bit more random than the ones without. It’s great for creativity and variety, but if you want determinism then models likeEulerorDDIMare reliable and fast. Check out this reddit post on a comparison between samplers!
- The exception to convergence are the methods suffixed with
- Of course, the prompt and negative prompts are the most important input into this process. You can get help from ChatGPT to help you create prompts or get inspiration from other creators (googling for “stable diffusion prompts” can get you started).
That covers most of the basic functionality of text-to-image generation with Stable Diffusion. There’s a lot of power to uncover through the various tabs at the top and custom scripts or extensions, but we’ll leave that for another time.
Have fun and let your creativity loose!