Ever since I participated in the first Summer of Code 4 years ago, I’ve been using Macs almost exclusively. I really enjoy using them - they’re great machines for developers, and the amazing virtualization options make them practically the only development computer you’ll ever need.
However, I felt like I was drifting too far away from what the majority of computer users operate on, even today. Not to mention, my roots are back in the Linux world, and in the back of my mind I’ve always wanted to switch back to a “PC” (the term in quotes, because Macs are PCs too!). I had heard great things about how much better Windows 7 and Ubuntu are than their predecessors, so I decided to take the plunge.
For work, I settled on a trusty, hardy Lenovo Thinkpad. The new x201s have great battery life, portability and power. I’ve really been enjoying dual booting Windows 7 and Ubuntu 10.10 on it.
When it came to my home computer, I wanted to get one of those beautiful 27” iMacs. However, Starcraft2 happened to release around the same time, and I found myself questioning the value of a computer that could not run it in ultra graphics mode. For the same price as the iMac, I was pleasantly surprised to learn that I could hand assemble a computer with most components near the cutting-edge. Awesome!
Ingredients
So I got to work. It is very convenient to order all the parts you need for a computer on Amazon. Let’s go through what you need:
CPU
Processor manufacturers have already hit the ceiling for how many transistors they can pack per square-inch, but now the race is towards how many separate ‘cores’ are available. Most software don’t even bother using more than one core, so the quad-core CPUs from either Intel or AMD should be more than sufficient for the next few years: I opted to go for the Intel Core i7 950 3.06GHz. You’ll want to note the socket type of the CPU and make sure you get a compatible motherboard (the i7 CPUs fit into LGA-1366 sockets).
Motherboard
Pretty standard choices these days, the differentiating factors are usually overclocking support, USB 3.0 & SATA 6gb/s throughput, and the number of PCIe slots. You’ll want to make sure to get a motherboard that matches the socket type of your CPU. I opted to get the ASUS P6X58D Premium.
RAM
32k may have been enough in the past, but you want to make sure you have atleast 4GB to stay competitive today ;) DDR3 is pretty much the faster consumer memory you can get in the market. I’ve heard that 1600Mhz is the sweet spot for i7 processors, going any faster won’t give you any significant performance boosts. I got a handy pack of 3 x 2gb sticks: Corsair Dominator 6 GB 1600MHz.
Graphics Card
It’s what puts pretty pixels on the screen; if you’re a gamer or design professional you’ll want to go all-out. I think having two cards in SLi (nVidia cards) or Crossfire (ATi cards) is much more efficient than getting a single very high-end card. Before you get two cards, make sure your motherboard supports the configuration and keep in mind that you can only link identical graphic cards. I chose to get two of the Gigabyte GeForce GTX460 1GB cards.
Power Supply
You get power supplies ranging typically from 400W to 1000W and you’ll want to choose one that keeps up with your hungry processor and graphics card, while still being economical. I got the Corsair CMPSU-850TX 850-Watt to fuel the two GTX460s and to give me a little room for expansion in the future.
Hard Drive
Solid state drives are catching on and becoming less expensive everyday. The performance boost is phenomenal, and I would highly recommend getting one for your boot drive. I got the Crucial Technology 128 GB RealSSD C300 because Crucial has been getting great reviews of late. You’ll still want a much larger regular spin disk, however, to store your movies, music and photos (the 128GB should be used only for your OS and frequently used applications). The Western Digital Caviar Black 1TB hard drive is a solid choice.
Tower
Finally, you need a case to put all of these parts in! While choosing a tower there are two sizes you need to consider: the ATX size which specifies the largest motherboard the case can accommodate, and the tower size itself which defined how much room for expansion drives, cards and ventilation there is. I got the Cooler Master HAF932 ATX Full Tower.
Keyboard, Mouse, Monitor, Optical Drive
These are all essential components of a computer but there really isn’t much to it. It’s mostly a matter of personal preferences. Just look around and pick one you are comfortable with. My choices were: Razer Lycosa Programmable Backlit Gaming Keyboard, Razer Mamba Wireless Gaming Laser Mouse, HP 2509m 25-Inch Diagonal Full HD LCD Monitor and Samsung Blu-Ray Internal SATA Drive with Lightscribe.
You do need a couple more things before you can being assembling your computer. A grounding wrist strap and a toolkit are highly recommended. Setup a nice hard, flat surface to work on.
Recipe
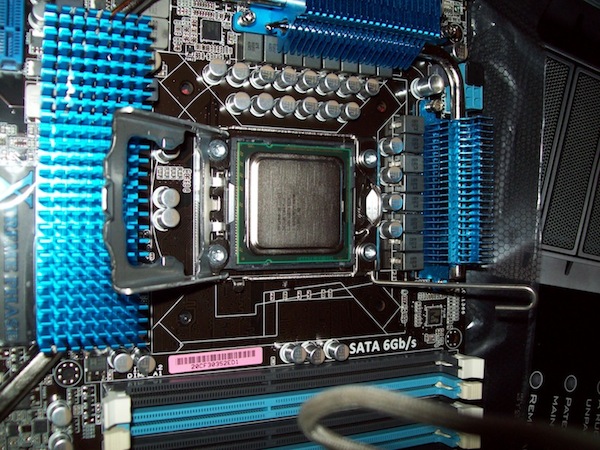
The first thing you’ll want to do is to mount your CPU on your motherboard. For the LGA1366 this was as simple as gently placing the CPU over the socket to match the nudge and then pulling the lever to lock it in. I had to put some pressure to lock the lever, but I only did it after I was sure I placed the CPU in the right orientation.
All the AMD/Intel CPUs will come with their own stock coolers. Mounting them on top of the CPU is very easy these days, as they come with pre-applied cooling paste. Just follow the instructions from the CPU box. I opted to get my own cooler and coolant, however, so mounting it was a little more involved.
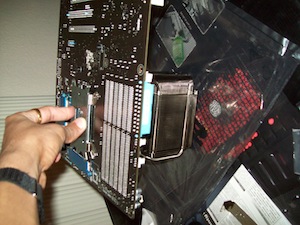 [](/images/2011/cpu-heatsink.jpg)
Now you’ll want to attach your power supply to your ATX tower. It usually goes in the extreme bottom or top of the tower.
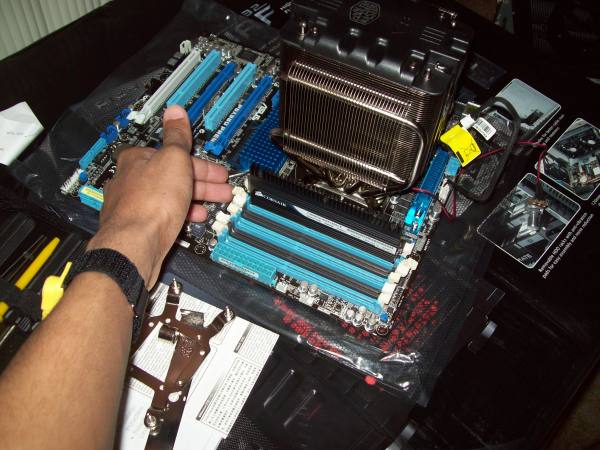
I prefer to attach RAM on the motherboard before mounting it on my tower so I have a better sense of where to place the PCIe cards. It’s also easier because your hands are constricted once the motherboard goes inside, and RAM sticks typically need to be absolutely vertical to their slots before they’ll go in.
Once you have the RAM in place, it is time to secure the motherboard onto the ATX tower. The most important step here is to first attach the double-edged screws that came with your motherboard. They raise your motherboard and provide screw sockets for the ATX to attach to. Do not try and attach your motherboard directly to the tower without putting these in between. There should be a half-inch gap between the metal casing and the lower side of the motherboard.
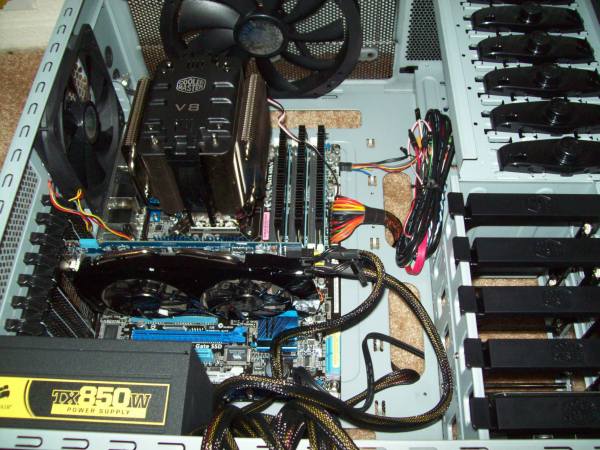
The hardest part is now behind you. Plug-in your video card, RAM and drives. Most of these are pretty much “push-click” based these days, really nothing much to it!
Done? Now all that remains is to tie everything together. This might actually be intimidating to some, but cables these days are designed not to fit in something they weren’t meant to. The basic steps are to connect power to your motherboard, video card, fans, optical and disk drives. Then, connect SATA cables from your drives to the motherboard. Motherboard control pins go to the front of the ATX (for LEDs and power switch).
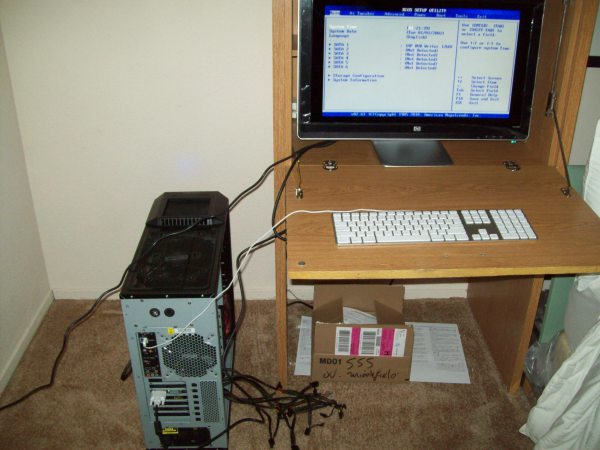
Take a deep breath. Connect the monitor and a keyboard and flip the switch. If all goes well, the fans will start whirring; and you’ll get a beep from the motherboard indicating POST succeeded. wOOt!
If that didn’t happen, maybe you got something other than a single beep. Different kinds of beeps can mean different problems, go the Wikipedia page on POST to troubleshoot. If you don’t get any kind of beep at all, and the fans aren’t spinning it means you missed a power supply cable somewhere. Double check to make sure the CPU cooler fan is running! If it isn’t your CPU will heat up very quickly – most processors will automatically shutdown when they overheat – but there’s a chance it may damage your computer, so double-check.
Get your installation media and put your favorite OS on your brand new computer. Give it a name, and learn to love it!
That’s all there is to it. I certainly had a blast assembling my computer, it was a nice learning experience; not to mention very economical. Well, I’m off to play some HD-quality Starcraft2!